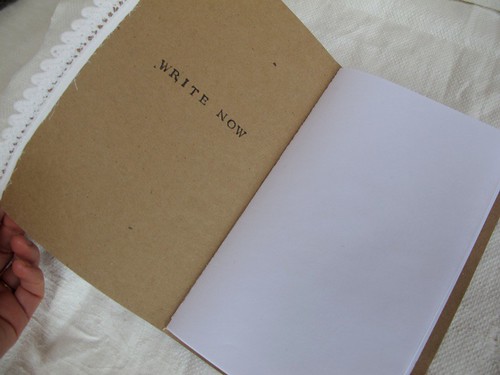
There is a lot of writing going on around here. Sketching, notes, and bits of this and that are filling up notebook after notebook. I was tired of purchasing Moleskines and decided to make my own. I wish I had done this sooner! I've made books before. My college roommate studied book arts and would take me down to the studios at night to watch her craft meticulous hand bound books with handmade paper. I still have a scrap of the beautiful fabric I used for one we created together. That was another lifetime ago, and I'm now more of down and dirty, whip em' up kind of book maker. I've sewn over twenty in the last month. They have gone to my kids, friends, b-day gifts, my purse, in packages. My method is quick and functional. There are scores of wonderful tutorials online for every kind of bookmaking you can think of. This is not one of them. I am simply sharing what I've been making lately out of scraps from other projects.
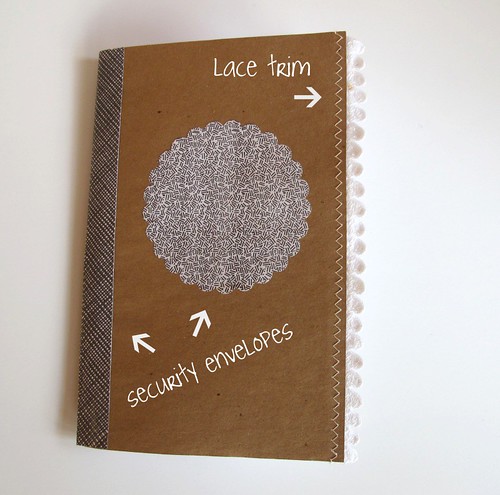
Heres my general method:
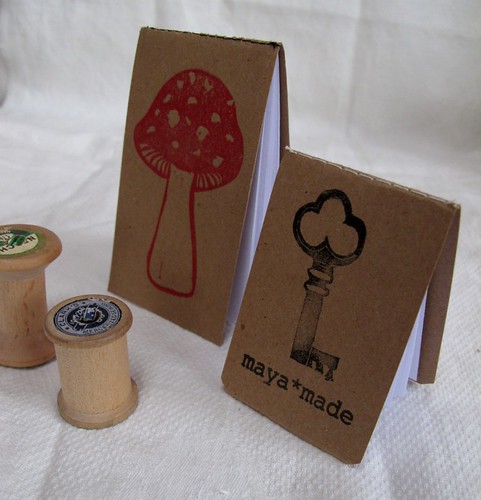
- Extra kraft paper or cereal boxes form the cover.
- Using a ruler, I find the center point and score it with a bone folder down the middle.
- Fold in half a mix of printer paper and found paper.
- Cut it to fit the size of the cover with my paper cutter. Insert it into the cover.
- Positioning the center of the fold lines of the paper directly on top of the fold line of the cover, I stitch a straight seam down the line (making sure to backstitch at the beginning and end).
- Done! It takes less than 5 minutes if your supplies are on hand.
- Embellishments (like above) are a fun addition, but I've been liking the simple ones recently.
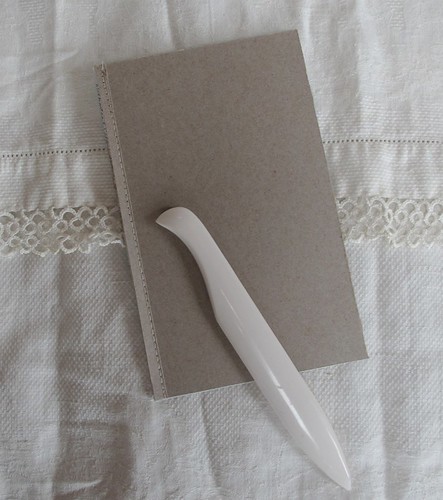
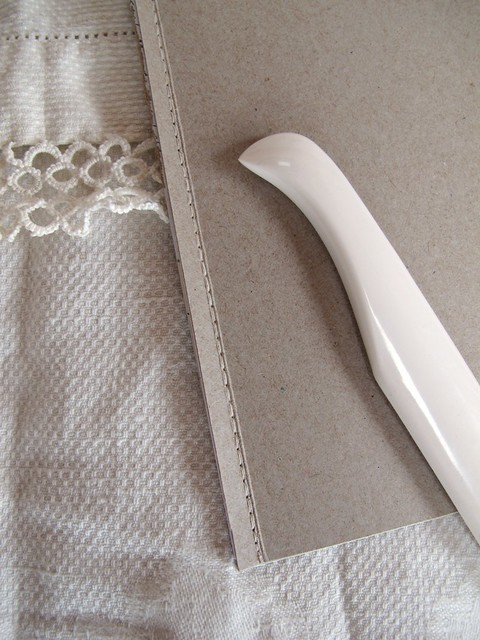
This is a different method. Some of my scraps of paper are too small to fold over. This style of binding utilizes them well. Two rectangles of a cereal box sandwich the interior papers. A seam on the top of the notebook encases it all together. Each side is then scored, parallel to the seam, to make for easy opening.
All of that "cutting paper to size" business left me with little pieces already folded. They make great inserts for tiny pocket notebooks.
Here's my new favorite: the mini folder. Determined to use up each scrap, I was intrigued by the cereal box sides. We often save them for bookmarks, but look what that little top flap can do:
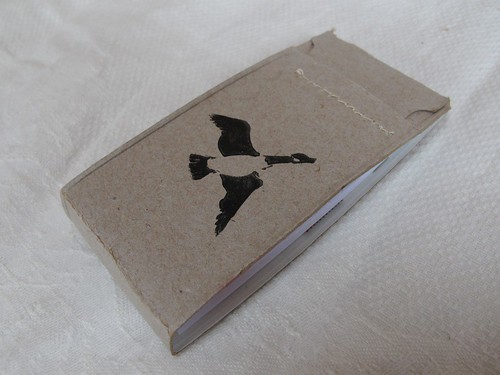
A slit can be made on an opposite side to create a slot for inserting the tab and closing the folder.
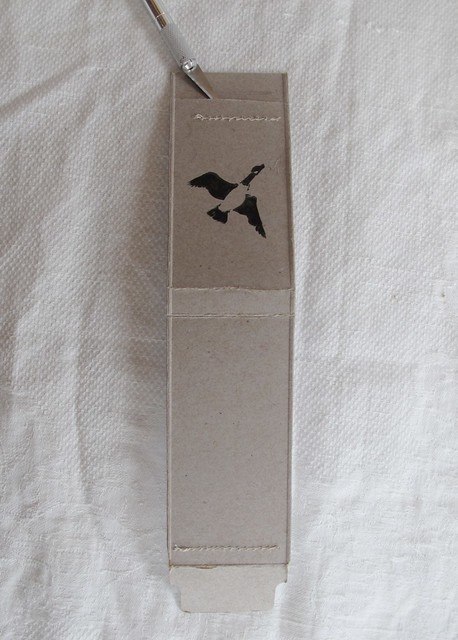
The bone folder came out again to make creases for folding. Little bits were sewn into place on either side. The stitches create a perfect perforated edge for ripping off a quick sheet for a phone number and such. Mine lives in my purse.
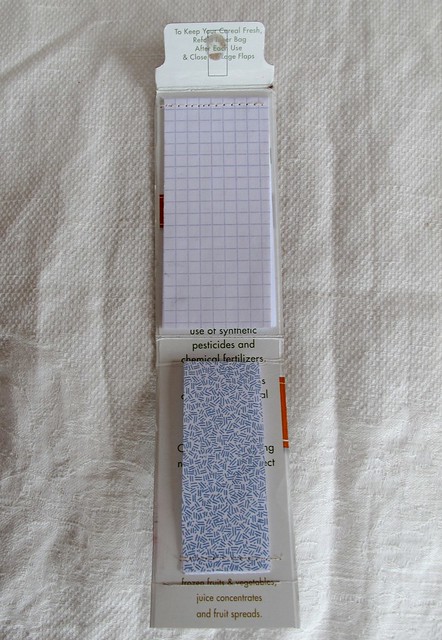
I've always loved stitching paper and this is a wonderful new way to use my machine. I know traditional book arts is not about quick and easy, but this process is quite fun. If you have a favorite technique (and I know there are some experienced bookmakers among you) or good links, please feel free to share in the comments.


I AM a bookmaker, and I love the books you made! i am always trying to think of ways to use up scraps... I don't have a sewing machine, though, so I couldn't do these books of yours. Not in the same, quick way, anyway. Bummer! ha ha... I love easy!
ReplyDeleteI did a cookie box book tutorial, but it doesn't use up ALL the parts of the box! Very nice! I especially love the box top notebooks! CLEVER!
xoxo
Maya your are so clever! I hope people tell you that daily. If not, I will ;) My little girl loves notebooks and I was running out of ideas for her. These are perfect.
ReplyDeleteWell, you know that I am all about the bookmaking, right? I'm with you on the quick and dirty bit, but I did do a tutorial for similar books about a month ago where I shared how to do the handstitching for those who aren't apt to whip out the sewing machine for this kind of thing:
ReplyDeletehttp://birdandlittlebird.typepad.com/blog/2011/02/basic-bookmaking-miniature-center-stitched-book-.html
Annie- how perfect! I will email shari in the comment above, to make sure she sees your link. thanks so much for sharing.
ReplyDeleteI have also sewn up some quick little books (as well as dabbled in the hand binding, though not so much lately). Fun! Do you find a particular tension on the machine works best? I forgot to change the tension on the first one and whoops! Not so good. ;) The thin one using the top of the box is terribly cute and clever. My main challenge is that my machine is not always up and available, since it doesn't have its own place to live still.
ReplyDeleteOff to check out the linked blog above... :)
What type of needle do you use and what stitch setting? I tried sewing up a couple of quick books, but I don't think my machine has a long enough stitch as all the pages just fell out.
ReplyDeleteI love the one using the sides! I am always using cereal boxes for something and I knew the side pieces would be useful some day. Will have to give this a try :)
awh, this is genious! easy, simple, handy *and* stylish - just the way I love it!! congrats and thanks for the inspiration!!
ReplyDeleteI just love all of your journals & books! I need to begin sewing...these are so wonderful, I want to hold them...use them! Ah, I must create and play!
ReplyDeleteGreat ideas resulting in beautiful notebooks. I can never find a scrap of paper when I need it and these will help so much organizing shopping lists and thoughts. Love them.
ReplyDeleteWhat great little books! I love that they're simple on the outside and have all the text and graphics fromt he boxes on the inside. Fun, fun, fun!
ReplyDeleteThese are just beautiful! Thanks you for the lovely inspiration.
ReplyDeleteYou made me want to make books, too.
ReplyDeleteI would also like to know what needle and stitch setting you like best. I had been thinking of sewing up a set of books for my husband's school kids for earth day, but wasn't sure if my machine was up for 25 books! :) Thanks for sharing your beautiful and functional books!
ReplyDeleteJust a quick note to let you know that a link to this post will be placed on CraftCrave today [16 Mar 01:00am GMT]. Thanks, Maria
ReplyDeleteHi everyone- thanks for the nice feedback! I use a universal needle and have tried different stitch lengths with varying results. Too tiny makes the bobbin stitches unruly, too long and it's not secure. My Pfaff is pretty heavy duty and I never worry about it's ability. The neatness of the stitching is a different story. I would recommend 4.5 mm as a good place to start. Experiment on your own machine with only a few sheets of paper at first. Good luck, I'd love to hear how it goes!
ReplyDeleteSo clever. What a great idea. I used to make journals similar to this in highschool, but I just used staples, ha. This is much nicer.
ReplyDeleteArgk! Stop blowing me away with your yumminess, Maya!! x
ReplyDeleteThanks for the inspiration, Maya. I will be making some of these for the boys. I also have plans to make some stamps too. Have a great day.
ReplyDeletesweet and smart!
ReplyDeleteLove this. My daughters make books all the time...but I use regular old staples to bind them...now we will totally be using the sewing machine! Thanks.
ReplyDeleteWhat do you mean that these books are not those wonderful tutorials? They look good to me and very ingenious using a cereal box. We eat beaucoup cereal in our house, AND we like to draw and sketch and write, so these will definitely be put on the list of to-do things.
ReplyDeleteHow thick can you make them in order to have your sewing machine needle go through it? 1/4"?
Thank you for this Maya. I have been wanting to whip up some homemade books to use here, but I always push it off. Seeing this is the push I needed to just try it. I have a huge stack of paper that I have been saving that is just waiting to become notebooks.
ReplyDeleteWarmly,
Tracey
I love making notebooks as well. I usually stitch by hand but lately, I've been itching to try it with my sewing machine. I absolutely love the last notebook you showed which uses the tab. So fun!
ReplyDeleteSophie
These books are lovely. I've been wanting to make some for a while, but am a little nervous of using the sewing machine!
ReplyDeleteHey these are just fab. Fresh and nicely designed. I'm a bookbinder as well, and am always inspired by your work. Thanks
ReplyDeletelove them!
ReplyDeleteI usually buy barebooks, but this sure beats that. I will have to make some for me, my kids, my friends...EVERYONE!!!!
Genius. I'm trying this sometime soon ^^ great up-cycling!
ReplyDeleteI've always been the one that loves notebooks--the sky's the limit to what you draw & write in those. Plus, making these at home kills extra free time for me. Thanks for this awesome tutorial
-kathy from http://cupcakes-music-fashion.blogspot.com