Tuesday, November 30, 2010

Simple Gifts: Lavender Breathe Cuff

breathe cuff
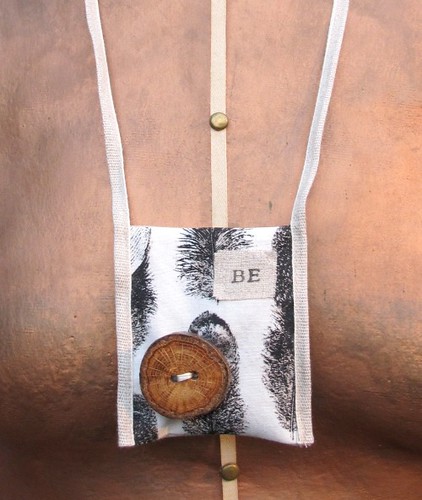
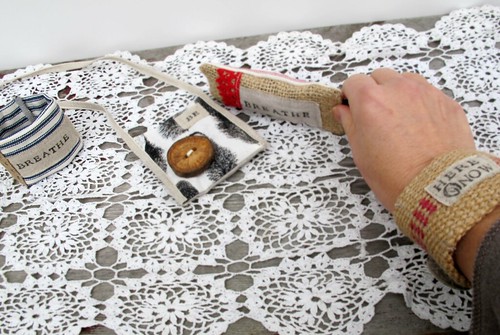
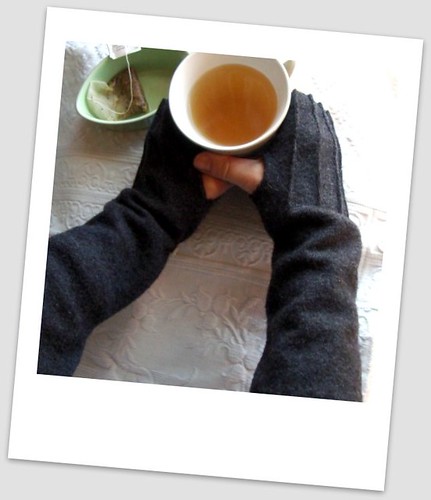
On the eve of my fullest month of the year (Chanukah, two b-days, an anniversary, Solstice and Christmas!), I am wearing my intention on my "sleeve": my very own wearable reminder to breathe. I made it right before we headed down to New York City for a wonderfully busy and family-filled Thanksgiving weekend. It did its job. Beautifully. Knowing this, I'm offering today's tutorial as part of the holiday Simple Gift Series to make for others... But I'm also suggesting you make one for yourself as you journey into your own busy month. A reminder that the rushing around is all really about love and giving. These cuffs are simple and quick, which means you can make bunches and still breathe.

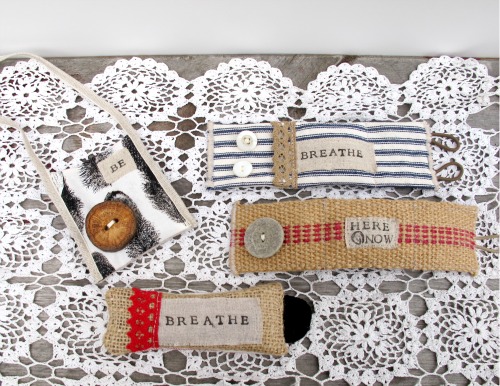
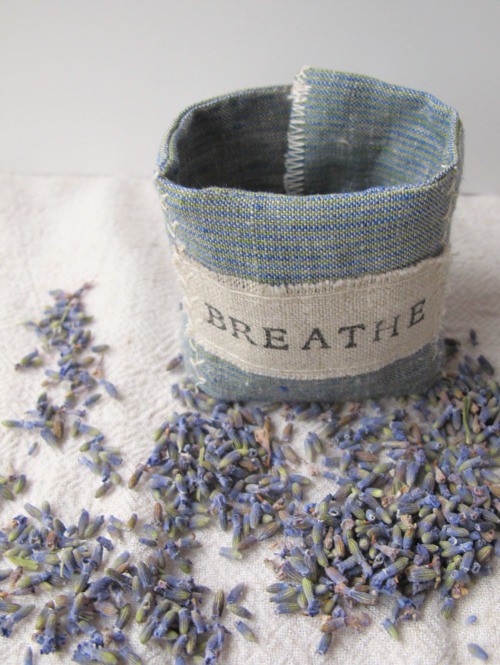
Wearable Reminder: Lavender Breathe Cuff
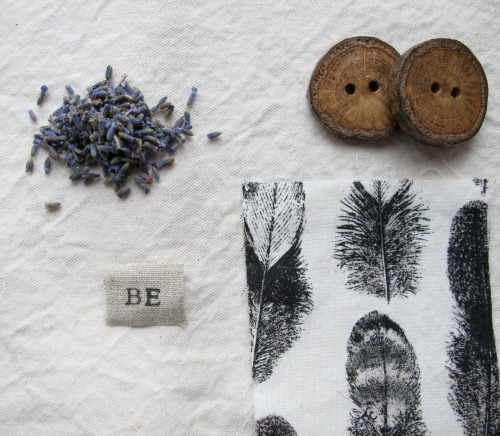
Need:
little letter stamps
ink pad (versa craft is great for textiles)
scraps of light colored linen
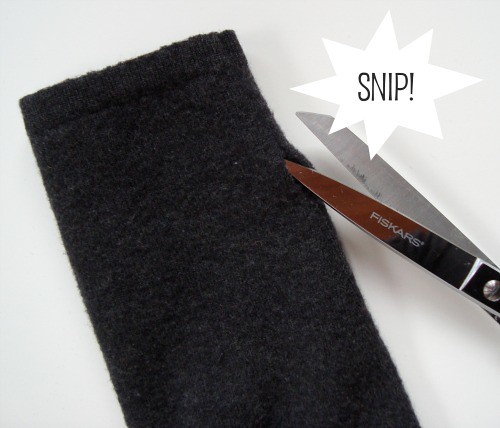
light weight fabric cut into two rectangles measuring 7 x 2 1/2 inches
hair elastic
button or two
dried lavender
Make:
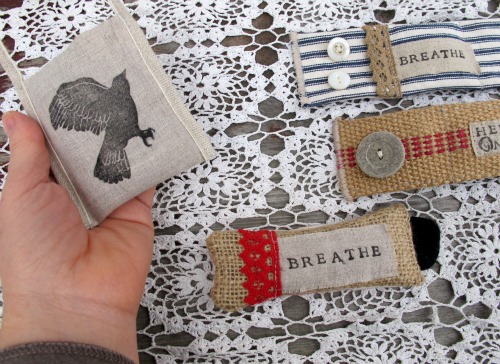
Before you get started, print a bunch of  reminder words (breathe, be, slow, embrace, truth, etc.) onto little pieces of light colored linen. I used a ruler to keep it somewhat neat, but a little skewed letter or two adds to the hand stamped soul of it.
breathe 1
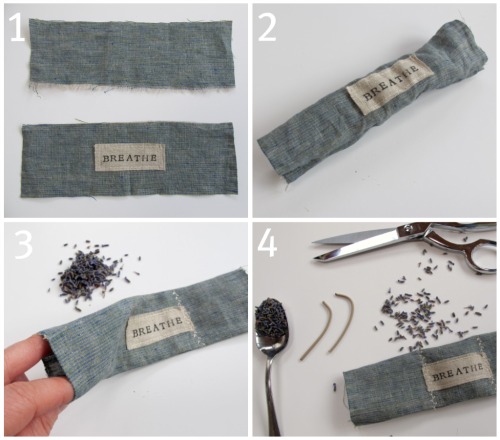
  1. Place your word in the center of one of your rectangles, and sew in place. There will be raw edges around the word. Pull a few threads to give it an intentionally frayed look.
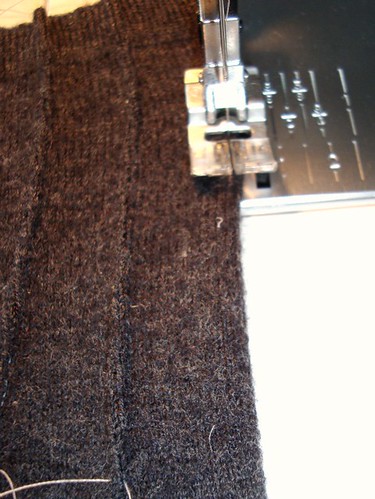
  2. Place rectangles together right side to right side and sew up along the long sides. Turn to reveal a tube.
  3. Press with an iron. Create the center sachet by sewing up one side directly over one of the seams holding down your word. I used a decorative stitch. Fill with a teaspoon or two of lavender. You don't need a lot.
  4. Sew up the other side of the center sachet.
breathe tute
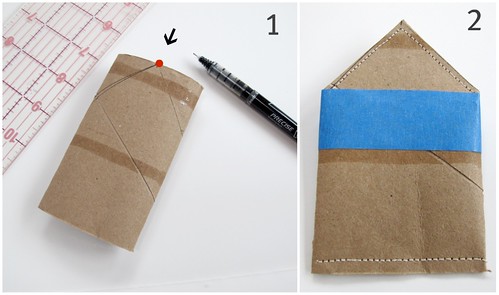
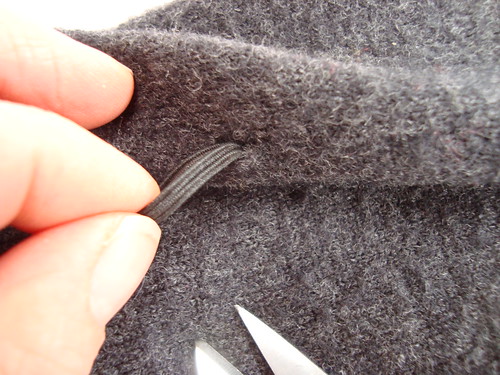
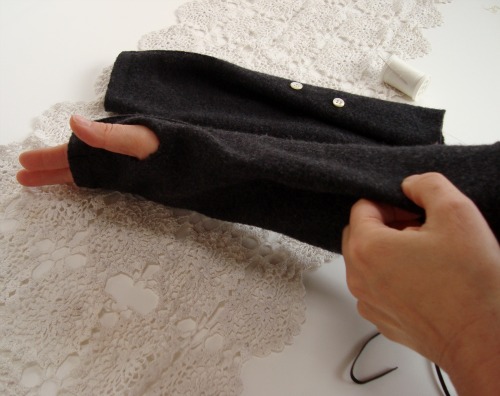
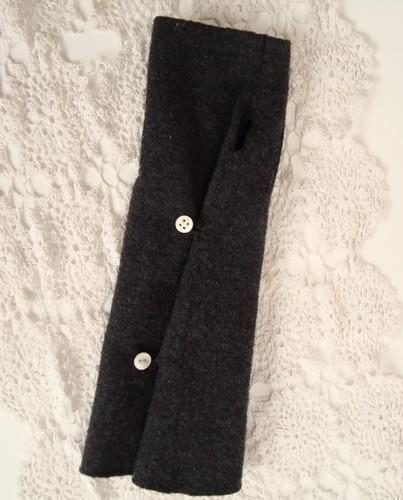
Finish it off by inserting a snip of an elastic hair tie on one end. Sew up each opening with a tight zigzag stitch. Add a button to the other side. An alternate version would include two elastic loops and two buttons. I found that after a weekend of wearing this one button cuff, the corners were turning. I decided to sew them down with a stitch or two (below right photo).  Love it. Check out Etsy (under supplies) for lavender, stamps and ink pads... lots of options!
breathe finished
Enjoy yourself . Take it easy. Slow down. Breathe in. And out. Love fully. Find your peace.
breathe 7 Pin It

Monday, November 29, 2010

hardware store inspiration

I stayed with my grandparents during every summer of my childhood. My grandfather used to take me for rides into town in his olive green Dodge Dart. We'd stop off at the library and then without a doubt, we'd pick up something from the tiny hardware store. I loved all of the little bins of screws and nails, and it was my lucky day if we needed some because I got to count them out into a small brown bag. It's no surprise that one of my favorite places to shop today is our local hardware store. It's got something the big box stores will never have: inspiration down every little and not overwhelming aisle... plus friendly and knowledgeable staff who always seem available. And the little bins of screws and nails are balm to my nostalgic soul. I love our Agway, truly! I stopped in last week for some holiday shopping and found the unexpected: new gift wrapping and decor ideas with materials I hadn't tried before. Below is a roll of tree trunk winter protection wrapping paper.Textured brown paper. Yum!
hardware store inspiration
It's fun stuff... photos soon!
Are you a hardware store junkie, too? Isn't it nice to know you're not alone? Pin It

whip up calendar

Kathreen, of Whip up fame, kindly sent me a complimentary copy of their annual calendar... a perennial  favorite of mine for my studio... especially last year's when I was featured in August! In fact, my calendar this year was inspired by the beauty of the previous two Whip Up calendars by Lulu. Kath switched things up this year and created a printable version in three formats: vertical a4/letter, horizontal a4/letter and vertical 2 printed to a page a4/letter or purchase the already beautifully printed hard copy from Redbubble. Such a great idea... wishing I had gone that route. Maybe next year!

Supporting Whip Up is always a wonderful thing!  Kath does such a fabulous job of showcasing crafters and artisans all year long, purchasing their calendar is a great way of saying "thank you"... and adding inspiring decor to your studio or home at a fraction of the cost in previous years. And hey, some of my dear friends are calendar girls this year! Congratulations to Sonia, Lisa, Lisa, Christine, PilliPilli and Meg... and all of the other talented artists featured!

Check it out right here! Pin It

Sunday, November 28, 2010

sponsor give away: Dirty Girl Clayworks!

Good morning, dear friends.  I'm so happy to announce a wonderful give-away by one of my new favorite artists: Faro of Dirty Girl Clayworks! She is generously offering one reader several of her handcrafted pieces:  a swallow knitting needle holder (or vase), and  two little sweet dippers: good for food or handy for buttons, thread, knitting markers, etc. They'd make a wonderful set, or divided up would make three beautiful gifts... however, I'd have a hard time parting with any of them if I was the lucky winner. Please leave a comment in this post before Tuesday at 9pm EST. I'll announce the random winner on Wednesday morning. Good luck!


Don't forget to check out her other wares when you're doing your holiday shopping. I know she has another dipper set in stock! Pin It

Friday, November 26, 2010

count-down calendar 2010

advent 1
I'm so excited to share this year's count-down calendar inspired, once again, by the humble toilet paper tube.  I loved the 2008 version and am quite proud of the 2009 iteration that landed in the recent holiday Woman's Day Special... but this year's advent calendar is my favorite! 24 little houses {with doors that open and shut} are hung from a bouquet of bare winter branches. This idea lends itself to customization of both the house decorating and the display venue. String them on a garland, nestle them in a little evergreen, or tack each one to a bulletin board in tidy rows. Perfect for making it represent your style and home. I still haven't decided how my family will showcase it come December 1st, but for now it's going on the mantle just like this. The branches are anchored in a recycled can filled with the same marble chips we grow our winter bulbs in.
advent 6
Hidden behind each door will be a time ticket (a family tradition now!) or a slip of paper with a clue to where a tiny treat is hidden in the house... treasure hunting is very popular around here. If you've been saving up tubes, but don't have enough for each day, just make these into sweet little ornaments instead.We collected them all year, so I had more than was needed for a count-down to Christmas. The extras were turned into blank houses for my children to decorate for ornaments and present toppers as we move into December. Here are the instructions for you to create some of your own:

Little Winter Houses
Need:
  • 24 toilet tubes (or the number of days you are counting)
  • paint and brushes
  • scissors
  • ruler
  • pencil or pen
  • painter's tape
  • fastener of choice: sewing machine,glue gun or stapler
  • Xacto knife 
  • standard hole punch
  • decorative hole punches (optional)
  • rubber stamp numerals and ink pad
Make:
  1. Create a pointed roof by marking the center point of an open end of the tube.  Using the  midpoint, measure an equal distance to the folded edge on each side. Snip off ends with scissors and close roof and bottom opening with your fastener of choice. I'm a huge fan of sewing on paper, so this is my favorite step.
  2. Decorate your house! I used a strip of painter's tape to quickly and evenly paint white roof tops.
  3. I removed the tape when the paint was dry and painted the base or kept it blank. The example I used for this tutorial only has one coat of paint. Later, I decided that two coats was the look I was after. Leaving them natural reminds me of gingerbread houses, so I ended up keeping a third of them like this... and I'm sure I'll be experimenting with that idea in the next few weeks.
  4. Using a straight edge and an Xacto knife cut three sides of the door. Gently score the side that will be the "hinge", careful not to cut through to the other side. Open the door and punch a hole for the knob. Punch a hole at the point of the roof for hanging or slipping on a loop of ribbon.
 advent step 1 and 2
advent 3
advent  steps 3 and 4

Put any finishing touches on your house. I love paper punches for their miraculous powers to transform recycled paper. Here I used the snowflakes and vines from Martha Stewart. Paper bags and envelopes have never looked so good!

advent embellishing
When you're done, arrange in the order that pleases you and number them. Rubber stamps make it simple. We hung them randomly from a branch, because searching for the right day is part of the fun!
advent 2
I'd love to see yours if you give it a try, so be sure to add them to our flickr group.
Happy Making!
Pin It

Wednesday, November 24, 2010

grateful

gathered
This morning I began writing about the symbolism of the many branches on this one tree, the gathering of individuals, and the building of community... but I think I'll leave you with just the image and a thank you. Your visits and contributions to this blog have created a sense of community I could have never anticipated when I began. I'm deeply grateful  for each and every one of you. I'll be stepping away from the computer to focus on my family.  See you back on Friday!
In gratitude,
Maya

p.s. Whatever your feelings are about Starlings... they sure know how to stick together! Pin It

Tuesday, November 23, 2010

Don't forget...

saving!
I hope that you're saving your toilet paper tubes again! Don't think that I've forgotten about our advent calendar. December is nearing. I'll unveil this year's tutorial very soon. I think it's my favorite so far! So if you don't have 24 tubes, maybe you want to start asking friends to save theirs for you. Don't be shy, every household has them. Let's put them to use with a magical transformation! Pin It

wearable reminders

be
I'm finally accepting that this isn't just the busy season of the year, it's the busy season in my life! There's a lot going on... it's rich, it's full and it often takes my breath away.  Sometimes I  forget how to stay grounded. I stumble without reminders to stay present and grateful for all that is and not get caught up in the mind's busy chatter. When I share these thoughts with you, I'm always surprised by the tremendous response. Obviously,  I'm not alone in this struggle. I have many helpful books in my library and inspiring podcasts to listen to, but those little words I left around my home seemed to have worked more than anything else! (Yay for handmade solutions!) But I'm not always home. In fact, the times that  I'm out and about are when I'm usually juggling too many balls and losing my balance. What if I wore my reminders or kept them tucked into coat pockets? Maybe add some lavender to the mix because its scent has always soothed, calmed, and led me back to my center with a few deep inhales. The above "BE" amulet is lightly filled and can be worn close to the heart or tied to the handle of a handbag for easy holding. The wooden button was hand crafted from a reclaimed branch of a sturdy oak tree and is smooth to the touch. I found it here, where they have a huge variety of beautiful tree branch buttons. The back side was printed with my crow. It remains one of my favorite stamps because it was inspired by a photograph of a crow getting ready to soar from the tree outside my studio window. Its image always gives me courage to leap.
be other side
So that's what those mysterious components were all about: wearable reminders. It actually began with some cuffs. First, I made the skinny little "breathe" sachet to tuck into a pocket.  I added the crochet trim from my friend Sonia to incorporate a little friendship and support. It's tiny but powerful. Then, I thought how nice it would be to display  words on your wrists... where you can't miss them. These cuffs were crafted with a thin center pillow of lavender.
wearable reminders
They're are all spoken for, but I bet you could make your own version. What a simple gift for yourself or someone you love. Perhaps a little tutorial is in order for lavender wearable reminders: to stay present in the moment.
wearable reminders Pin It

Monday, November 22, 2010

big ol' bucket

So here it is... the biggest burlap bucket I've made for sale so far! It was created from a carefully selected section of a rescued coffee sack from my local roastery (Gimme!). I lined it with a sturdy and repurposed  length of canvas and gave it a little extra structure with bamboo batting. Eco, green, hand-crafted, and made with happy intentions... this bucket is ready for filling! It would be a wonderful addition to any living room... great storage for a throw or extra pillow. And for those of you with lots of extra WIPs scattered in many baskets, well here's a spot to keep them all together. It measure in at a hefty 16 inches tall by 12 inches in diameter and was just featured in the Food Network Magazine's holiday gift guide for food lovers (and coffee lovers)!  It's available right here securely through Paypal.   
Ginourmous!

Price: $65  Shipping $8.50


Sold
Phew! that was fast! Thank you!


Pin It

Sunday, November 21, 2010

Food Network Magazine

food network mag gift guide
 Early in the fall I was contacted by the folks at  the Food Network Magazine. They were interested in featuring one of my burlap buckets for their big holiday gift guide. Exciting stuff, even if I've slowed down on production work.  I was asked to make a custom sized one for the guide: a super duper huge version! As a rule, I rarely do custom orders.  This seemed like a good time to make an exception... don't you think? FGM's request was that I have it for sale directly on my blog, so I made another bucket with one of my favorite coffee sacks and the same dimensions as the one shown in the guide below. Can you find it? 
food gift guide
My big ol' bucket with wonderful bold black typography will be available right here in tomorrow's post. I got into a serious sewing groove on Saturday and crafted four more various buckets and lots of sweet little somethings with those "components" from Thursday's post. More on all of that in the morning.  Here are three of the buckets awaiting their finishing steam iron touch up. To give you an idea of size, the smallest is my usual large!
buckets in a row Pin It

Thursday, November 18, 2010

components

 components
 I've had many behind the scenes projects filling my days and keeping me running. I keep coming back to read this post... for guidance and  inspiration. I  had wanted to take the words a step further and a little something is finally in the works. In the small moments between this and that, I have been gathering possible components. I wonder if anyone can guess where I'm going with them... it's not the obvious, or maybe it is and I can't tell.
components Pin It

Wednesday, November 17, 2010

wool ropes and coils

wool coils spontaneous head band
I'm loving the process of coiling woolen ropes into spirals. I started playing with these a few weeks ago using the same technique I used with newspaper for these, but with thread vs. glue.  One day I took a couple of spirals and cinched them (with a few stitches) to a ring of wool I was using to hold my hair back. My new favorite headband was born... and out of total spontaneity and with quite a bit of wonkiness. The funny thing is that it's receiving an embarrassing amount of attention. So simple, but something about it has made multiple people stop and comment... including folks in the waiting room at the dentist office and in line at the grocery store! I know it doesn't look like much, but I believe those wonky little spirals have something dynamic going on, and I'm planning on making bunches more for all sorts of projects.
b&w with headband
The key:  recycled felt strips by Wooly Fabulous, who just happens to make the most amazing wool creations. I just peeked into her shop, and she doesn't have any supplies in stock right now, but she does have a pdf tutorial for purchase with very clear instructions for her tried and true secret method for creating your own. Even better! I bought some of her ropes (along with this tutorial) last spring, and I'm so happy to finally be experimenting with them. And now that I'm almost to the end of my rope (ha!), I think I'll be using her tutorial for whipping up bushels of my own. Spirals won't be the only think I'm making...
wool coils Pin It

Tuesday, November 16, 2010

Green Rainbow Shop winners!

Good morning! And the lucky winners to the $50 gift card to Green Rainbow Shop are:

Annette said...

The best all rolled into one. awesome! Thanks.

MamaAngel said...

I LOVE this shop! The wrap is gorgeous.

Congratulations! I'm so excited for both of you. Please contact me with your e-mail address so that I may pass it on to the shop. Happy shopping! Pin It

Monday, November 15, 2010

weekend warmth

found
The sun was so kind to us this weekend... each day hit at least 60 degrees with endless blue skies! Lots of outside work (we had almost given up on) got checked off the list ... wahoo for cleaning gutters with kids! Don't worry they were on a side of the house where we only needed a short ladder/step stool. My 5 year old was so excited about the idea that she was REALLY helping.  It was so nice to be battening down the hatches with enthusiasm not shivers.  The children gathered kindling  in short sleeves not heavy coats and mittens. We talked a lot about animals preparing for winter and how we were just doing our own kind of nesting... and then we magically found a little nest that had been abandoned before completion. And yes, there were some moments when bare feet were seen outside!
holding on
I had been so ready to welcome the oncoming winter, but now I'm holding onto warm weather... just like this last magnolia leaf in the midst of bare branches. Luckily, I have some nice ways I'm planning on getting into the holiday spirit. And you can be certain that I'll be sharing them with you. Have a great start to your week! Pin It

Saturday, November 13, 2010

sponsor give-away: Green Rainbow Shop

Good morning friends. I'm so happy to announce today's giveaway! Green Rainbow Shop is a wonderful resource for eco shopping for the holidays and everyday. Green? Check. Organic? Check. Handmade? Check. They carry such a nice variety, that there's bound to be something special for everyone on your list. Today they are generously offering a $50 gift card to not one, but TWO lucky readers!!! If you'd like a chance to win please leave a comment in this post by Monday at 9pm EST. I'll announce the random winners on Tuesday morning. Good luck!


Green Rainbow Shop will also be offering a 15% discount to maya*made readers through 11/30/10. The code is MADE. Pin It

Friday, November 12, 2010

pumpkin muffins

pumpkin muffins with secret powers
If you've been following along on twitter, you might know that yesterday had a rough beginning. We woke up to NO hot water and spent the second day in row hanging out with our very nice, but loud plumbers. My children were home from school, and I was a bit cranky. I'll be the first to admit it. At around 9am when breakfast didn't make itself as I had hoped it would, and my daughter desperately needed a focus beyond the chaos in the basement, I pulled out my trusty can of organic pumpkin. Time for muffins. They really do have transformative powers, you know. My hungry girl made them with very little help besides opening the can and a little measurement guidance. This recipe can be made with roasted pumpkin or baked yams, but I always keep a couple of cans in the pantry for mornings just like this one. Unassuming. Filled with good things. And so tasty my son finished the last FOUR this morning. You may want to make these over the weekend. Just saying.

Pumpkin Muffins
Makes enough for a tray of muffins plus one loaf of bread.
Ingredients:
  • 2 cups of pumpkin (one can is just a little short, but works out fine)
  • 1 cup of oil
  • 1 cup of maple syrup (we've also used brown sugar)
  • 4 eggs
  • 3 1/4 cup of whole wheat pastry flour
  • 2 teaspoons of soda
  • 2 teaspoons of powder
  • 1 teaspoon of salt
  • 1 1/2 teaspoons of cinnamon
  • 2/3 cup of apple juice or milk
  • 1 cup of a mix in
  • mix-in suggestions: chocolate chips, pecans, raisins, dried cranberries, diced candied ginger

Make:
  1. Preheat the oven to 350 degrees
  2. Beat all we ingredients until smooth.
  3. Combine all dry ingredients and then add to the wet.
  4. Toss in a cup or so of whatever mix in options you happen to have on hand.
  5. Bake in a well greased muffin tin and one loaf pan until golden and a toothpick comes out clean.(This recipe made a dozen muffins and one 8x8 square pan)

    These hit the spot, and our entire day shifted. Pleasant, cozy, and content are words that come to mind. After lunch we discovered that a little dollop of Nutella on a pumpkin muffin is nothing short of divine. Have a great weekend! Pin It

    Thursday, November 11, 2010

    simple gifts: (pencil pleated) wrist warmers

    wristies
    First and foremost: thanks so much for cheering me on in my attempt at letting go of fears. When I didn't get to publish this post yesterday(various obstacles), I had another day to squirm and adjust my comfort level. Maybe it was just what I needed. But now I'm super happy to share today's tutorial... it's the first of this year's edition of my Simple Gift Series.  Some of you may remember these from the previous two seasons. Check out past projects here. The holidays are really sneaking up on us now, but no worries. I'm sure we can knock off some presents from our list if we keep the making of them... simple. These wrist warmers were whipped up out of necessity during last week's freezing temps. I was having a hard time getting anything done because my hands were so cold. They were a gift to myself, but now that I see how much I'm wearing them, and just how useful they are... onto the winter present list they go!
    wristies loose
    I'm sure there are tons of tutorials for wrist warmers from cast off sweater sleeves, but what makes these unique are the little details. To give them a fitted feeling around the fingers I created 5 parallel pencil pleats down the length of the hand with contrasting white thread. This gave them such crisp tailored look even though they were only sliced sleeves. Those little pleats looked so familiar, and then I realized that they were reminiscent of my grandmother's traditional leather gloves. Her father had immigrated from Romania when he was a small boy and grew up to be a glove manufacturer. There is much family lore about my great grandfather George, and I think he must have channeled those pleats, somehow.
    wristie pin tucks
    So, now they were snug in the hand but loose enough around the wrists to pull on over a sweater. Maybe too loose. So, I created a fitted option by sewing on buttons and some elastic loops on the arms. Now they have the ability fit over sweaters or to look trim... and even elegant (check out the final photo in this post).
    If you'd like to make a pair, and I think you might, look for wool sweaters with a fine gauge and subtle cuff. Throw it in your washing machine and dryer for some quick felting and then get started.
    Materials: 
    Two sweater sleeves
    4 buttons
    4 loops of elastic or hair ties
    thread


    Make:
    1. Slice off sleeves if you haven't already. Somewhere above the elbow.
    slice
    2. Try your wrist warmer on for size. Shorten it from the cut side. If you're satisfied with the length proceed to snipping the thumb hole.  I did this part by feel not measurement. A simple: oh this is where my thumb needs a hole! Make sure that the side seam is on the same side as your thumb, if possible, so that you can snip along the seam.
    snip
    3. Sew pencil pleats: starting about an inch from the thumb hole- fold and sew down 1/8 of an inch from the side. Begin at the top and sew in a straight line down about 4 inches.I flared the bottoms a slight bit. My pleats aren't perfectly straight because I was experimenting and eyeballing as I went. For the next pair I might pin them first... or maybe not.
    pencil pleats
    4. Make four more parallel pin tucks/pencil pleats every inch. Snip threads.
    5. If you'd like the fitted version make a teeny tiny hole along the seam below the thumb. Insert a loop of elastic and sew it in place.
    adding loop
    I used sturdy button thread since I felt there would be a bit of stress on it. Sew second loop several inches down. Try it on to see where best to place your buttons and then attach them, too.
    taking in
    underside
    On a cold and crafty morning you can slip on you wrist warmers (wristies), grab a cup of tea, and head to your sewing machine for making a couple more sets for giving!
    wristies fitted
    Pin It

    Tuesday, November 9, 2010

    about::being brave

    tweaks
    Hi, it's me. Yup, here I am. Today is all about being brave. Being visible. I occasionally tuck a photo of myself into a post, but it's always done with much angst and a wince. I'm not a shy person, but being behind the lens is just way more comfortable for me. This past weekend Kathrin came over for tea. While our girls played, we slipped out back for an impromptu photo shoot. Somehow, having her there to make me laugh hysterically made it not only painless, but loads of fun. And what's more, I've been avoiding a real about page for so long, because I didn't have a recent (or decent) photo that felt like it represented ME. Well, look above and you'll see that I got over that today. In fact,  I've added several tabs under my banner with a couple more on the way. Conquering little fears adds up... and after awhile fearless becomes your middle name. I'm not there yet, but I'm getting closer.
    Here's an out take...
    outtakes 2

    I laugh easily. Sometimes I resent my deepening smile lines... but then I remember why they're there and that just makes me smile some more.
    Go out and be brave today... even if it's in a small way. Every bit counts.

    p.s. just because you might be curious... my new scarf came from here, and I've barely taken it off since it arrived. LOVE. Pin It