
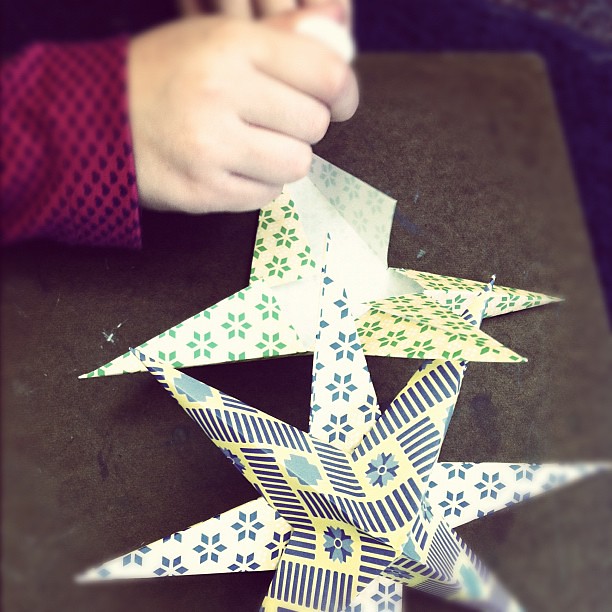
Last week I fell in love with a star. A paper star. A simple to make and beautiful to behold star. My friend Kathrin made them as a young girl growing up in Germany. She showed me how easy they were, and then we taught all of the children in our daughters' class (see above photo). The ages range from 6-9, and they were each totally successful... just to give you a sense for your own children. Kathrin has a tutorial to follow right here.
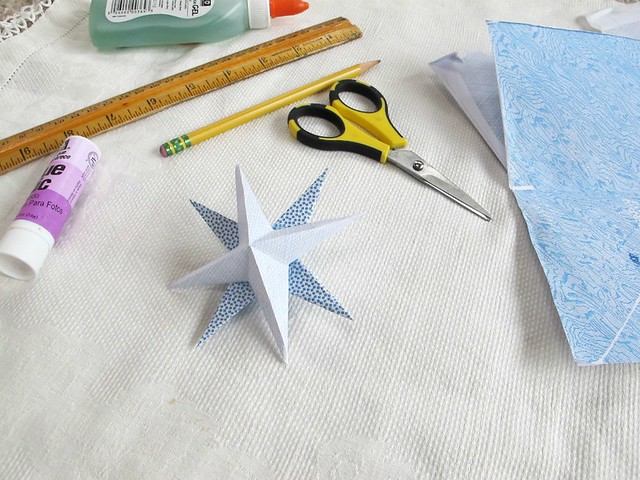
There are two changes that we figured out with the experience of making them with so many children. Use a glue stick instead of white glue, except for the last step when you need a stronger bond for holding each half together. Clear glue is nice for that, but good ol' original Elmer's is just fine.
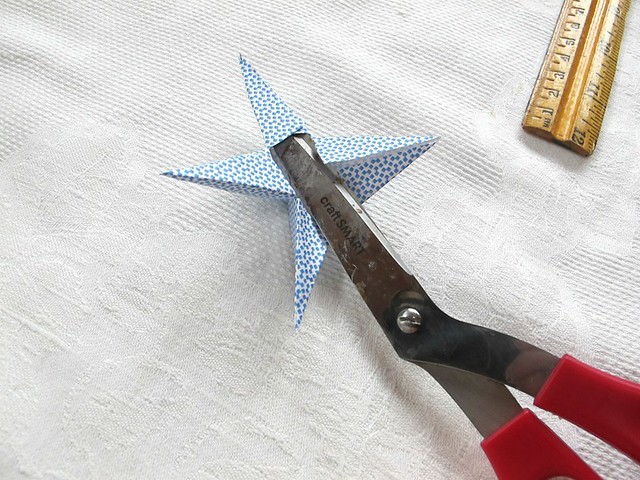
A pair of old scissors (they might get sticky) helps tremendously when pasting the flaps of each star point together. Like so:
I can't stop making them! They come together quickly (in minutes!) and look so impressive. I made a bunch to string as a garland. These were made out of 3" squares cut from security envelopes. The weight is slightly heavier than origami paper and makes them very sturdy. I always love mixing and matching the patterns, and this project truly shows them off.

Now that I've made my garland, I'm not ready to stop. Neither is my daughter. I think I'll cut a bunch of squares of other found paper and keep keep them in a basket with all the supplies needed to make them whenever one of us has a spare minute. They'll make perfect present toppers for everyone on our list!


Looks just lovely! :-)
ReplyDeleteThose look fantastic! I need a new garland to hang in our dining room. These would be perfect. Thank you for sharing Maya.
ReplyDeleteOh I've wanted to make these for a while! I haven't seem them so small, perfect for garlands!
ReplyDeleteThanks for sharing this Maya!
Have a great day!
xoxo
~ joey ~
These are so pretty.
ReplyDeleteoh Maya, these are little gems ! I will make sure to make them with the boys in January, once the advent calendar will be over.
ReplyDeleteJust noticed what you wrote after your yesterday's post ... oh my, thank you my friend. I'm so touched by your words, but return the compliment to you. You have been an inspiration for me too, even though I'm not commenting here as much as I'd like.
xoxo
Aren't the envelope prints pretty! We made similar stars last year from a different set of directions--I think they were bigger too--it can be so satisfying, the folding and gluing. We kept the stars hanging over the dining room table for months!
ReplyDeleteThese are great! What a fantastic solution to all that junk mail.
ReplyDeleteOoh, those are beautiful. I think I'm going to have to try those right away. What beautiful garland they will make. Thank you!
ReplyDeleteGreat idea. I'm going to try it. Thank you for sharing.
ReplyDeleteI'm so excited to try this. I love how they look as a tree garland! Because of your posts, I've been saving security envelopes all year, so all my supplies are ready. :)
ReplyDeleteThese stars are so gorgeous. I want to make a bunch of them. Thanks
ReplyDeleteI definitely will try this star project especially since you mentioned that they are easy to make and make such an impact. Love It!
ReplyDeleteLove these! Can't wait to try making some. Thanks for sharing this idea!
ReplyDeleteawww, cute decoration for Christmas :) thanks for sharing :))
ReplyDeleteMaya, i made a couple of these stars last Christmas and hung them in our window. I love them so much that they have been hanging there all year. I like yours strung on a string. I guess I'll have to make more. :0)
ReplyDeleteoooooooooh I have to make these this weekend!!! thanks! you have the best ideas EVER!!!
ReplyDeleteThank you for reminding me of AnneKata's post on the stars from last year - as I have time on my hands due to a broken foot, these were a perfect project yesterday morning for 2 Mummies whilst the children were playing (a teaching strike closed school). We made ours from old music books, they look fabulous, pre-aged paper adding to the look! I will make some more today so that we can have a garland of them.
ReplyDeleteThanks for the tutorial link! I miss annekata.
ReplyDeletelooks like we've found our craft project for today!
ReplyDeleteTrey will go berserk over these he is so in love with stars!
ReplyDeletelove them! I am going to have my chiquitos help me make some.
ReplyDeleteOh these are so pretty! I've been looking for a simple & impressive star for my teeny tree in my office at work and I think this is it. Thanks for sharing!
ReplyDeleteThese are wonderful! I'm going to open security envelopes more carefully from now on. How long did it take to accumulate enough to make this project?
ReplyDeleteI'm so happy you posted these! We just finished making some and they are so fun and easy and gorgeous. Thank you!
ReplyDelete